Follow the steps given below to install Ubuntu inside Virtual Box.
1 First download virtual box on your window system click here.
2. Download ubuntu ISO image file click here.
3. Install virtual box by default parameter.
4. After successful installing virtual box on window system. open virtual box Click on New.

5. Enter Name of virtual machine and select Linux in Type also select Ubuntu-64bit after then click on Next.

6. Select amount of ram by dragging slider in green side. you can select as much you want then click on Next.

7. In Hard disk select Create virtual hard disk now and then click on create.

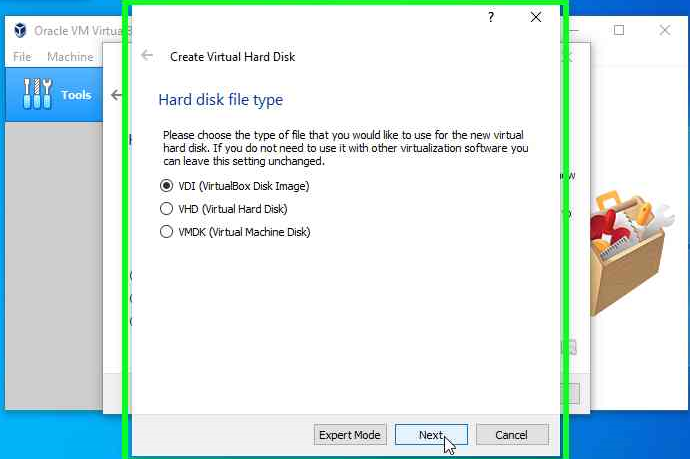
8. Then select VDI (VirtualBox Disk Image) click on Next.
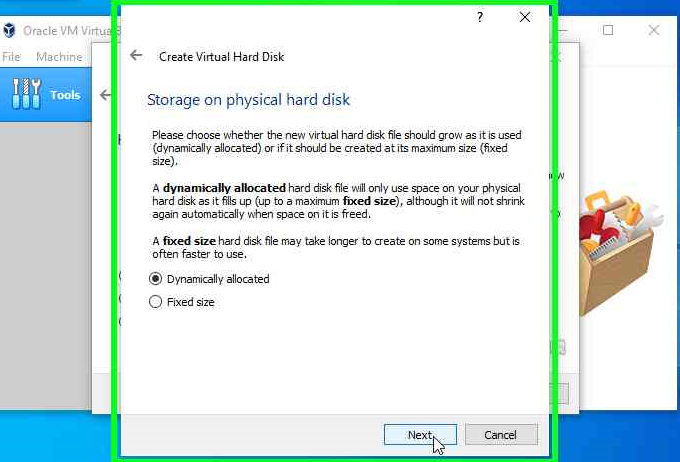
9. Then select Dynamically allocated click on Next.
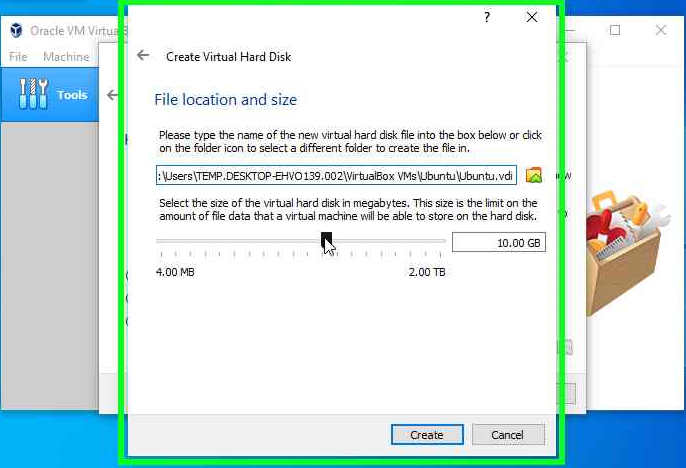
10. Allocate memory to Virtual Machine by dragging slider allot at least 50GB or as per your requirement then click on Create.
11. After creating virtual machine select virtual machine(Ubuntu) and click on Settings.

12. In General go to Advanced setting in Shared Clipboard select Bidirectional and Drag n Drop select Bidirectional then click on OK.

13. Go to storage section there below Controller: IDE click on Empty.

14. Then in right side Optical Drive click on cd symbol.

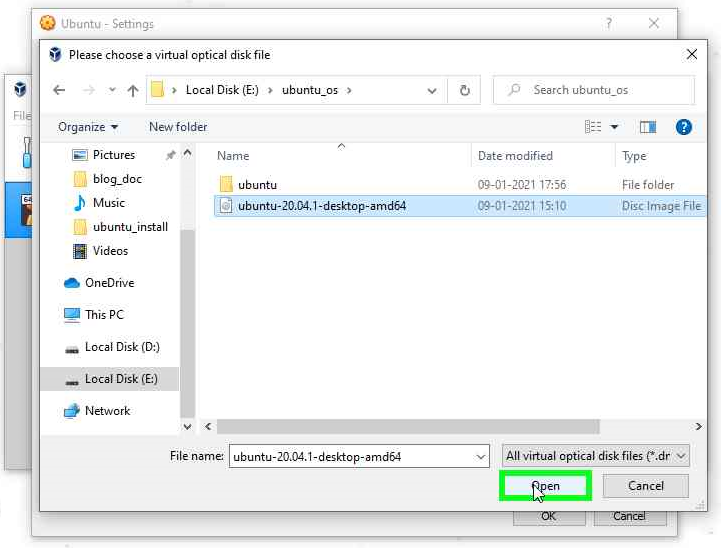
15. Select choose a disk file.
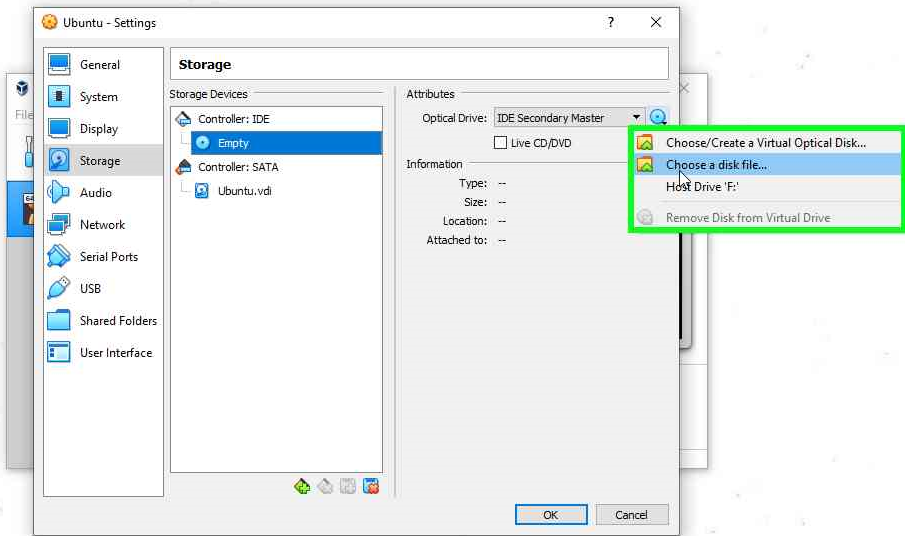
16. Select downloaded ubuntu ISO file there click on Open.
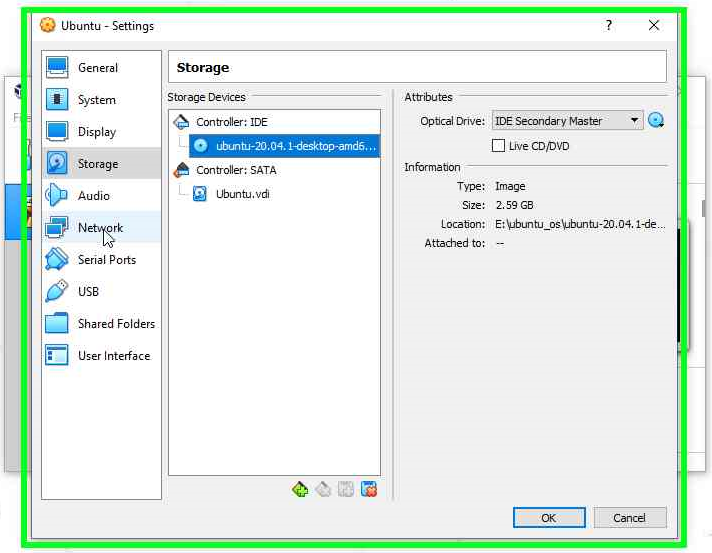
17. Then in Controller: IDE instead of Empty it show ubuntu ISO file name if it is then click on OK.
18. Select virtual machine (Ubuntu) click on Start.

19. Select language you want and then click on Install Ubuntu.

20. Select Language click on continue.

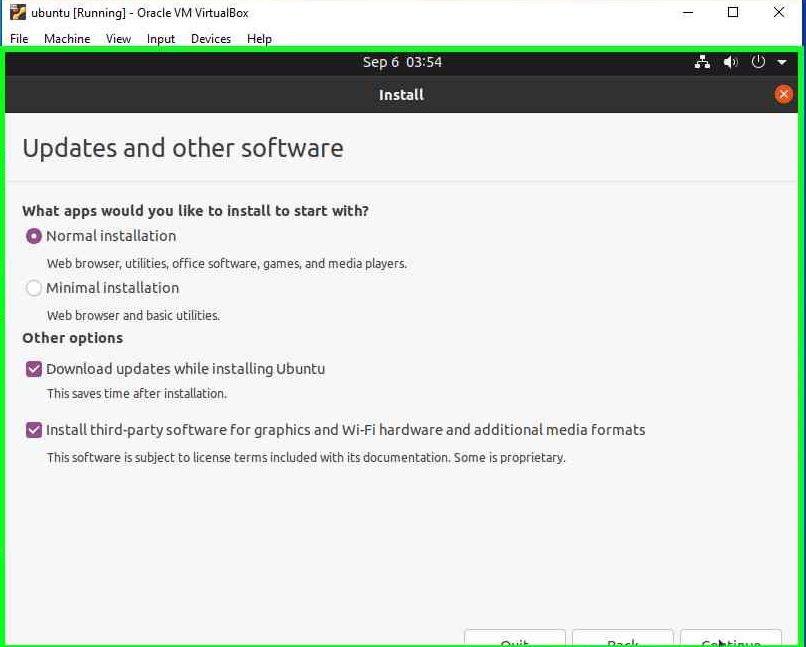
21. Checked Install third-party software also then click on continue.
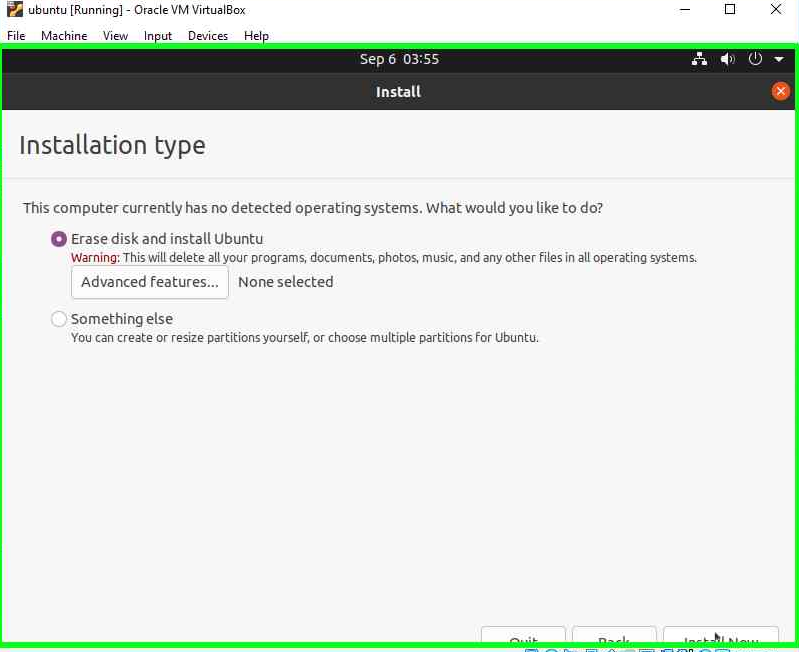
22. Select Erase disk and install Ubuntu click on Install now.
23. Click on continue.

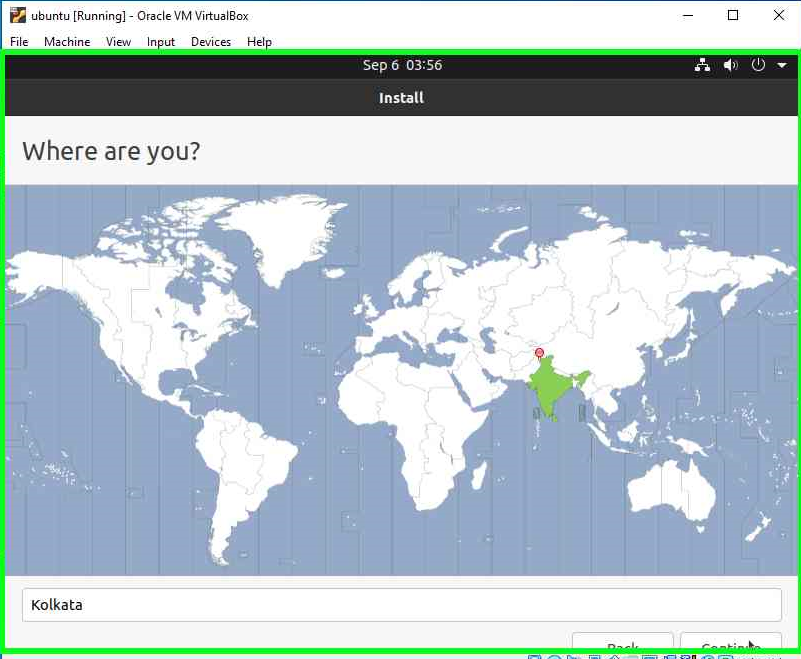
24. Select your time zone as per your country. click on continue
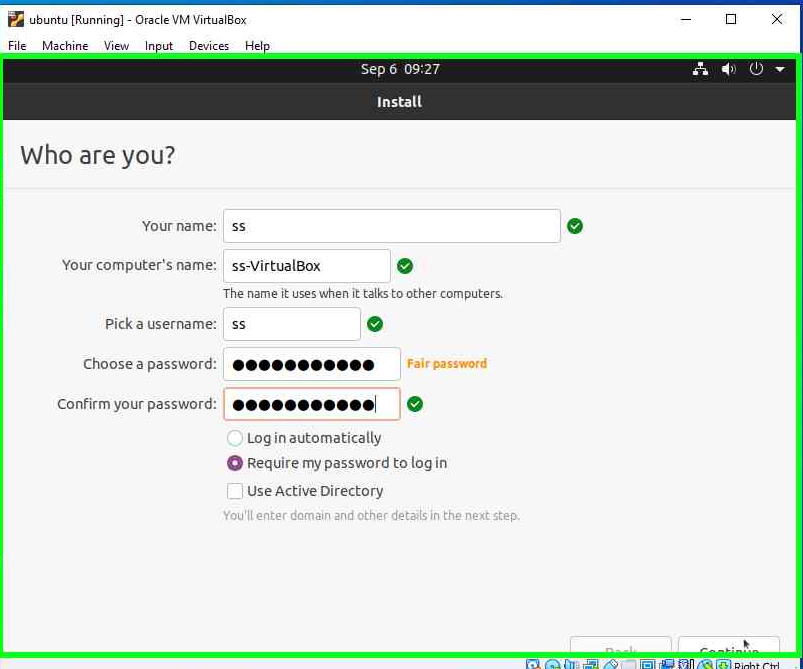
25. Fill all the required field as per requirement and click on continue.
26. After successful completion of above step then it will ask you to restart you can simply click on restart now After that you are ready to use Virtual machine Ubuntu system.
👍👍👍👍👍
